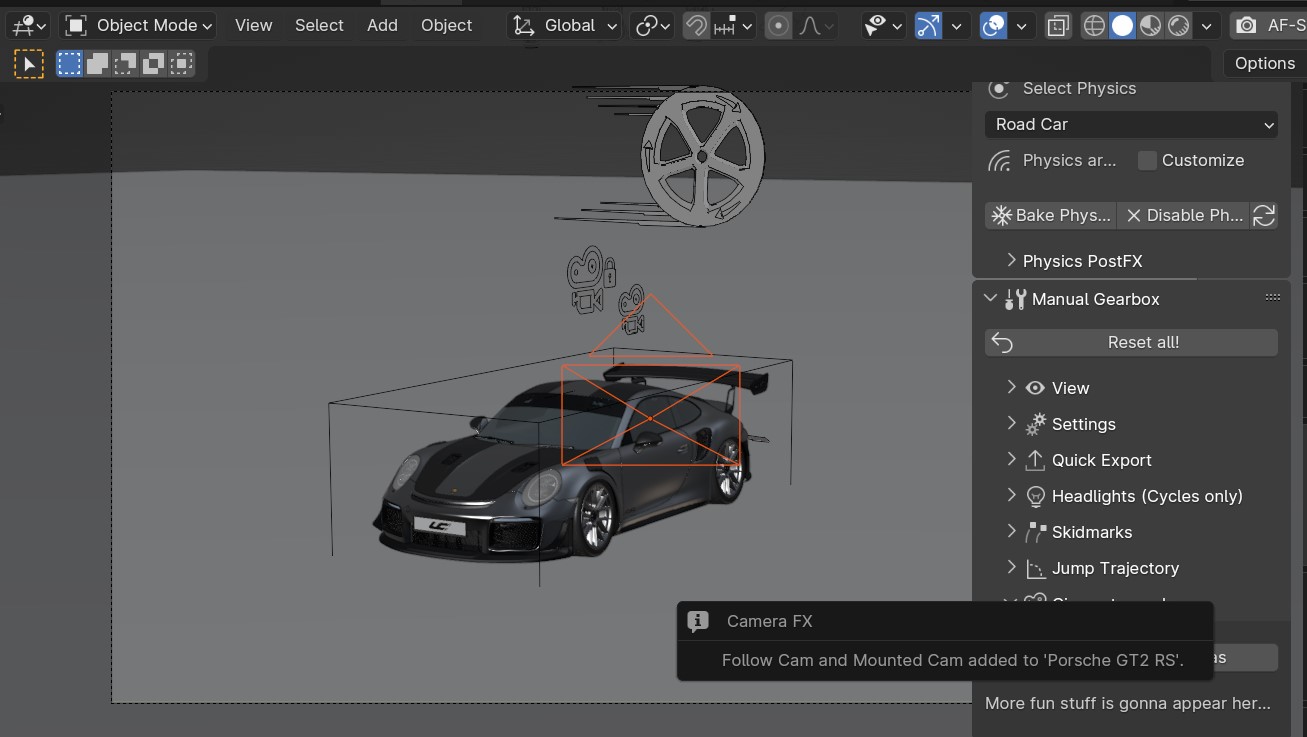
Manual Gearbox
Inside the Manual Gearbox you have a wide range of customization options to make LC work better for you. This is also where you can reveal advanced sliders and handles in the Add-on UI and 3D viewport.
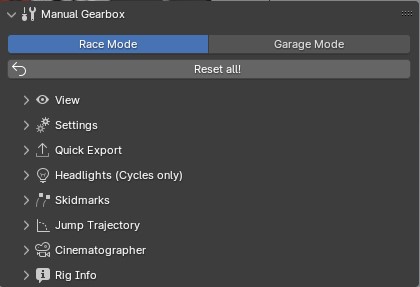
The Manual Gearbox in the N-Panel
Garage Mode
Changing the mode to Garage Mode will get your vehicle ready for new tires, change track width or other model changes. In the “Garage” all animations will be disabled temporarily and the vehicle is moved to the center of the scene. Blender also enters “Local View”, so all other objects will be temporarily hidden until you go to “Race Mode” again.
Body, Wheel, Brake, Headlight and Steering Wheel attachment bones and setup controls for wheel-base length, track-width length, wheel radii, and roll center can be found in this mode. Enter “Pose Mode” and select and move the handles to start adjusting. You can manually parent meshes, nulls and armatures to the body or wheels.
Note
The vehicle will temporarily be put into the center of the scene and all animations disabled. All animations will be restored when “Race Mode” is entered again.
Reset all! Will reset all LC properties for the active vehicle to their default value.
View
The View Panel has options for what will be shown in the 3D View over and around the Vehicle.
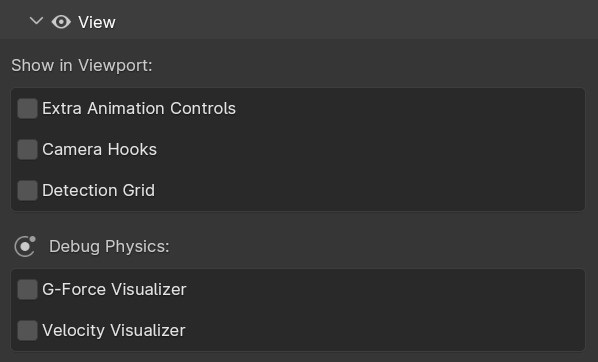
View Panel in the Manual Gearbox UI
Extra Animation Handles
Enables extra animation-handles and Sliders in the 3D view above and around the vehicle.
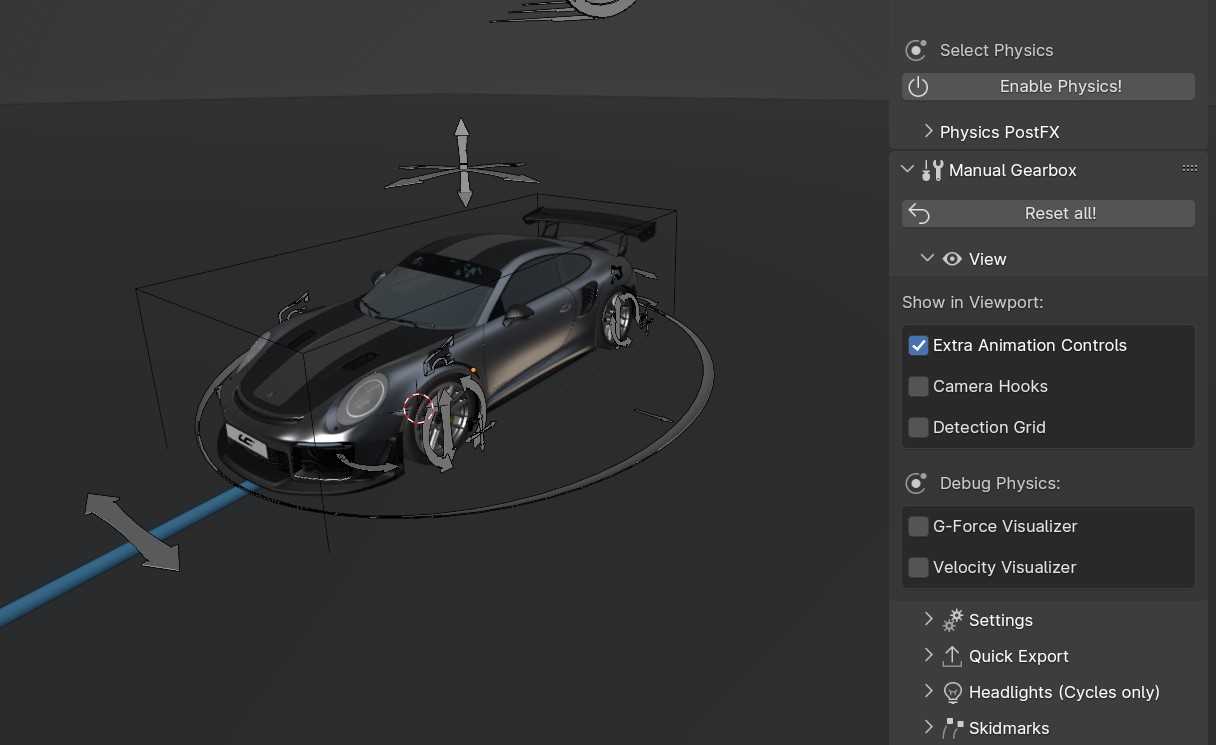
Add Extra Handles to control more things!
Camera Hooks
Shows two Camera Hooks hovering above the active vehicle. Go into “Pose Mode” to select them and parent your camera to them. The “Follow Cam” will track the general motion of the vehicle without taking the suspension into account, while the “Mounted Cam” will be attached to the body of the vehicle, following its every move
Alternatively, you can create hooked cameras with 1 Click in the Cinematographer section.
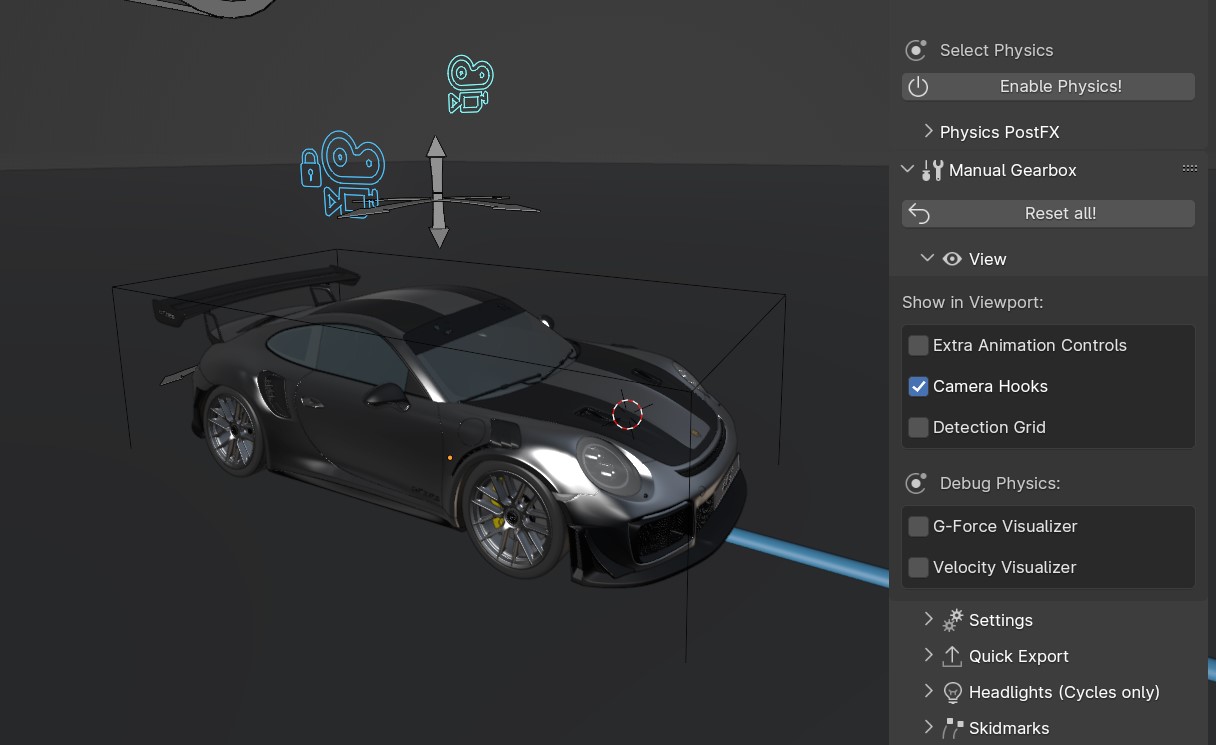
Attach your 3D Cams here
Detection Grid
Turn the visibility of the Ground Detection debug grid ON/OFF.
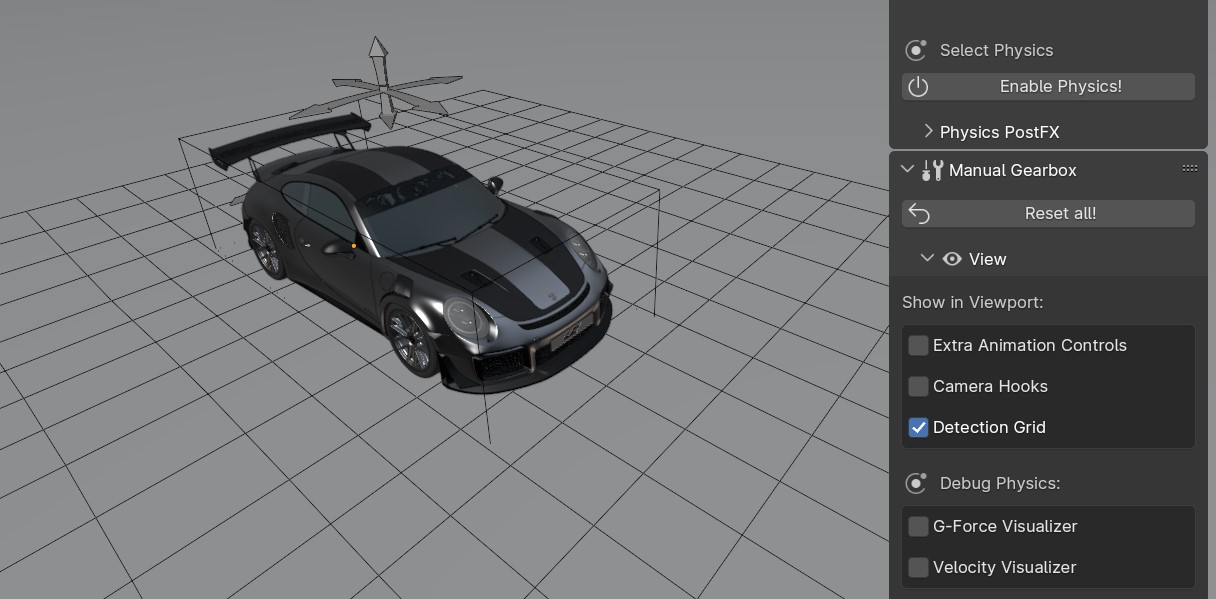
Useful for Debugging the Ground Detection
G-Force Visualizer
Enable an G-Force Visualizer in the viewport to see the force calculated and used by the Real-Time Physics.
The G-Forces which are working on the vehicle
Velocity Visualizer
Enable a Velocity Visualizer in the viewport to see the velocity calculated and used by the Real-Time Physics.
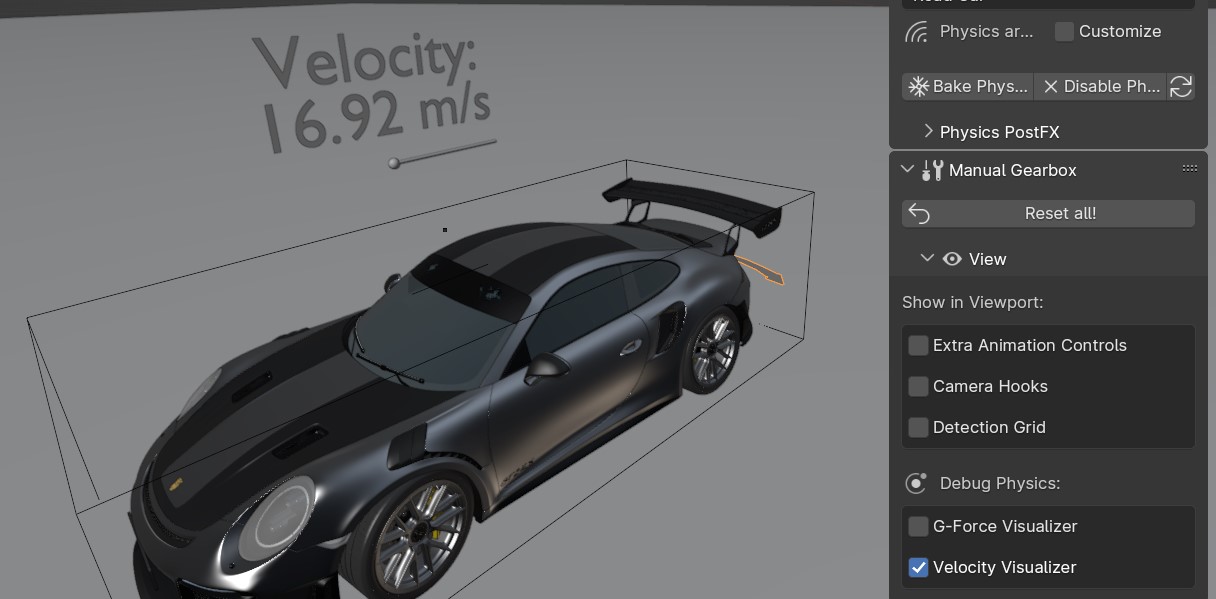
The Velocity of the vehicle
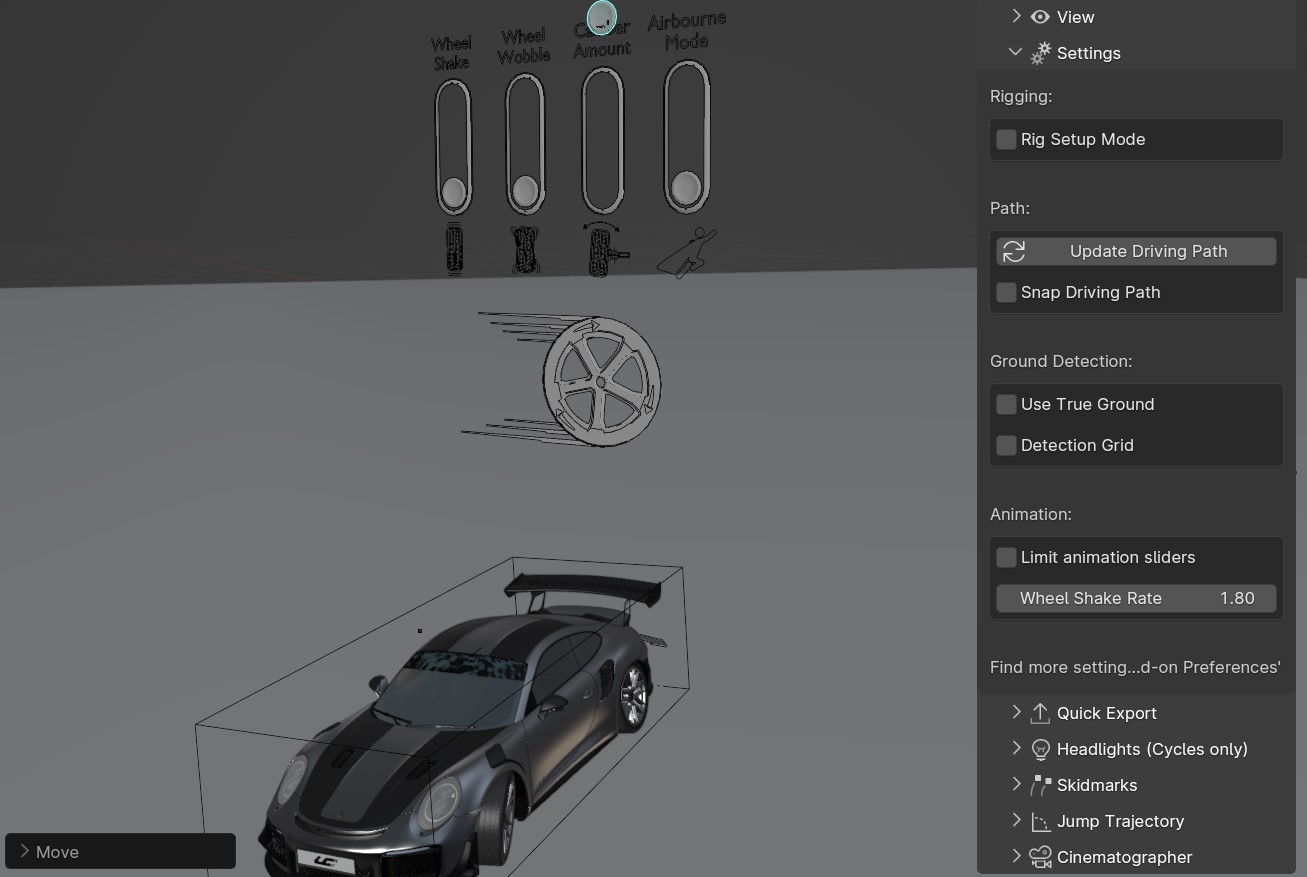
Settings
The Settings Panel controls how the Ground Detection, animation-handles, Driving Path behave. You can also enter “Garage Mode here to adjust the vehicle and add new meshes to it.
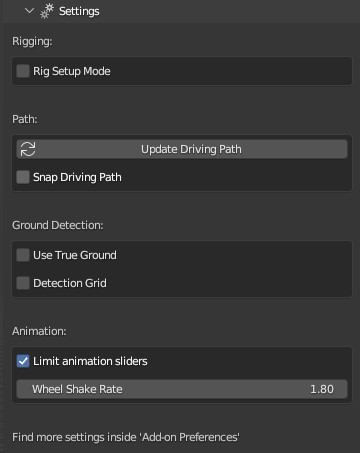
Settings Panel in the Manual Gearbox UI
Update Driving Path
See: Update Driving Path
Snap Driving Path
Automatically snap the Control Points of the Driving Path to the Ground Detection Meshes.
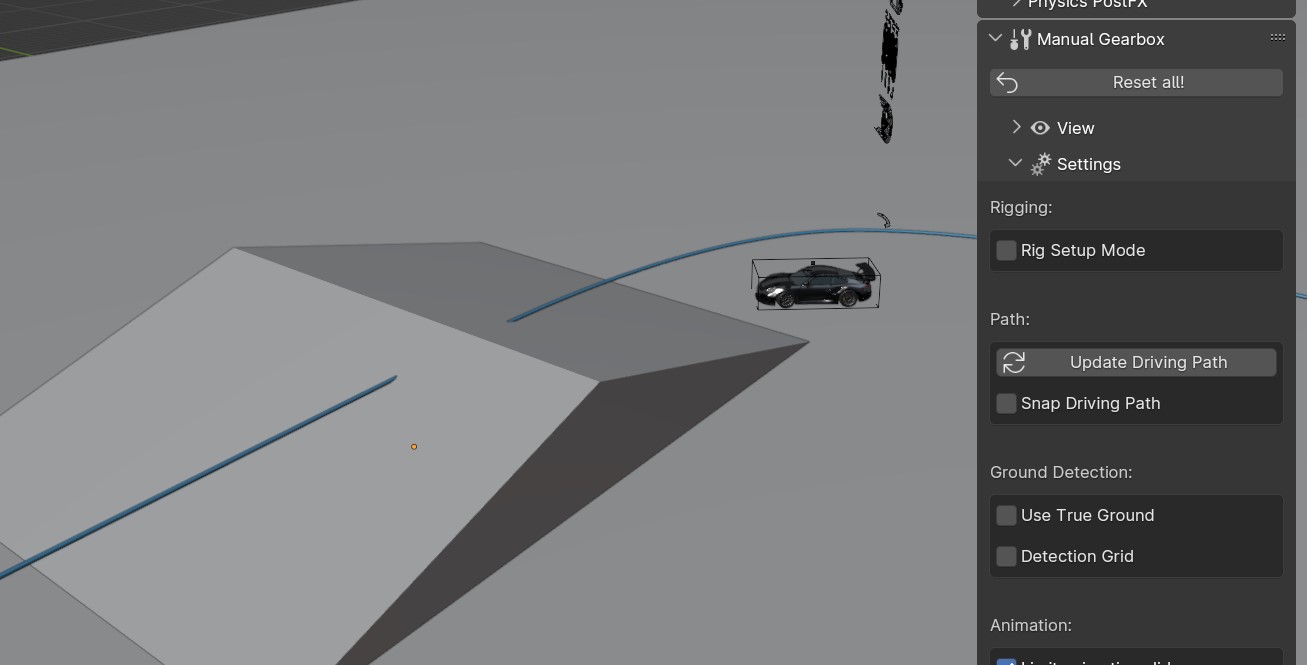
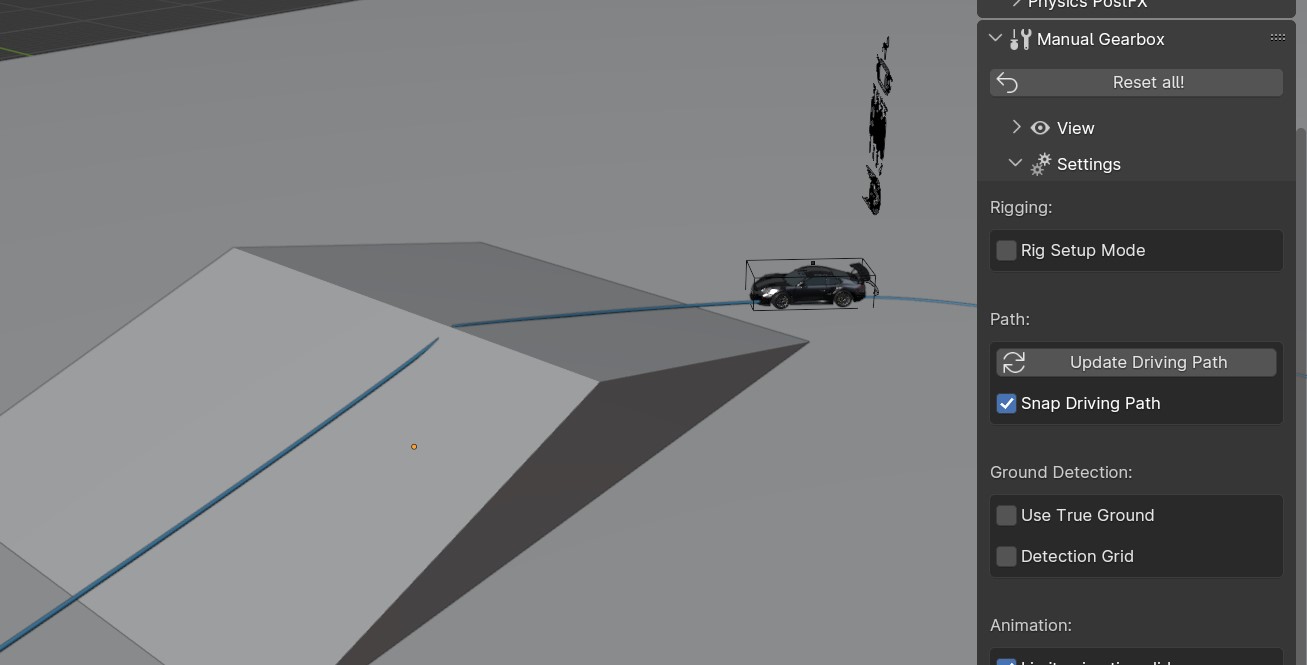
Driving Path Snap OFF and ON. A quick way to match the path to the ground.
Note
The threshold for the vehicle detecting the ground is 4 m. If the vehicle is further away than this, it will instead stick to the path.
Ground Colliders
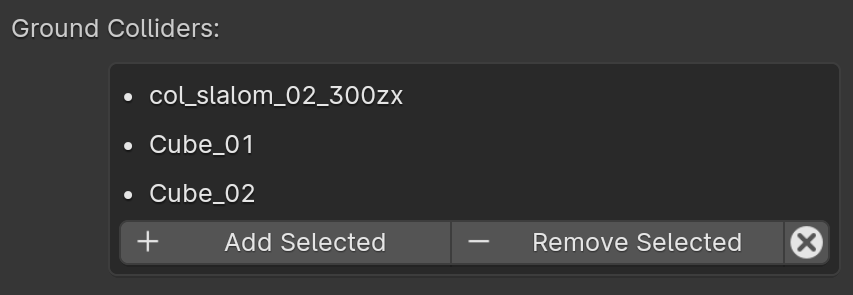
List of meshes contributing to the Ground Detection
Launch Control uses automated Ground Detection. To make any mesh contribute to the ground detection you can either add it to the collection “LaunchControl -> GroundDetection” or simply select it, and hit the “+ Add Selected” button. To remove a mesh, select it and hit the “- Remove Selected” button. The “x” button removes all meshes from the Ground Collders list.
Detection Grid
See: Detection Grid
Resolution
Change the resolution of the detection grid which is projected onto the geometry inside the “Ground Detection” collection.
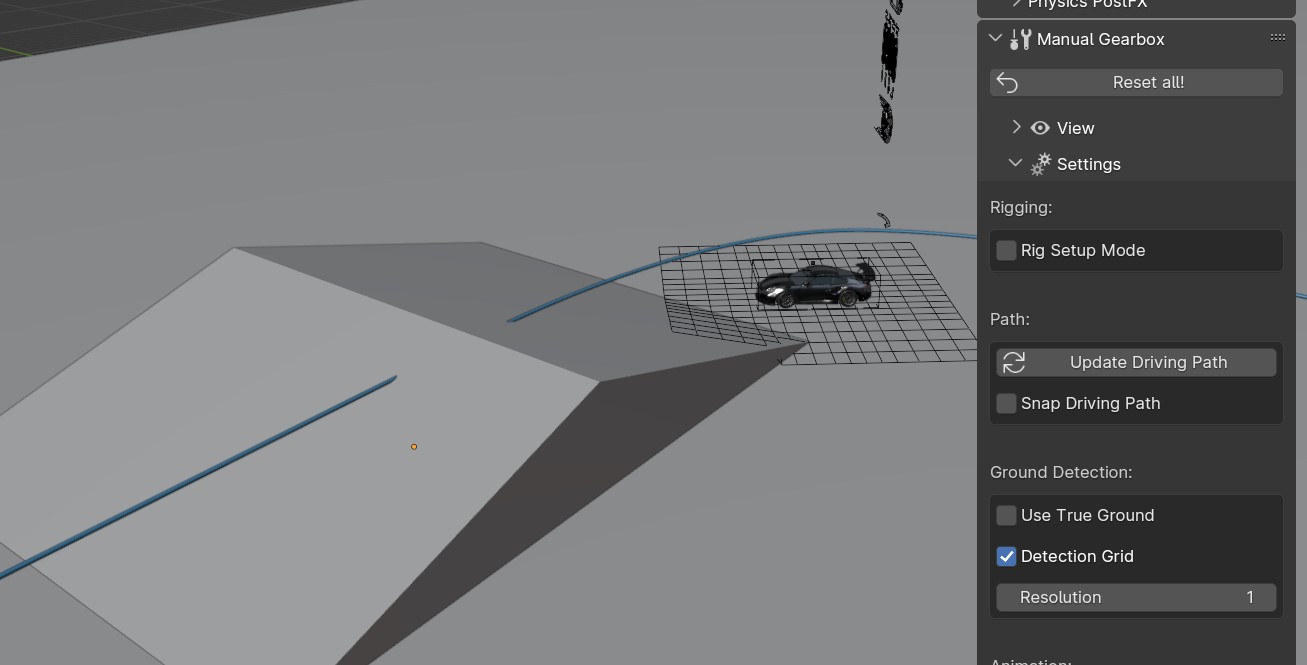
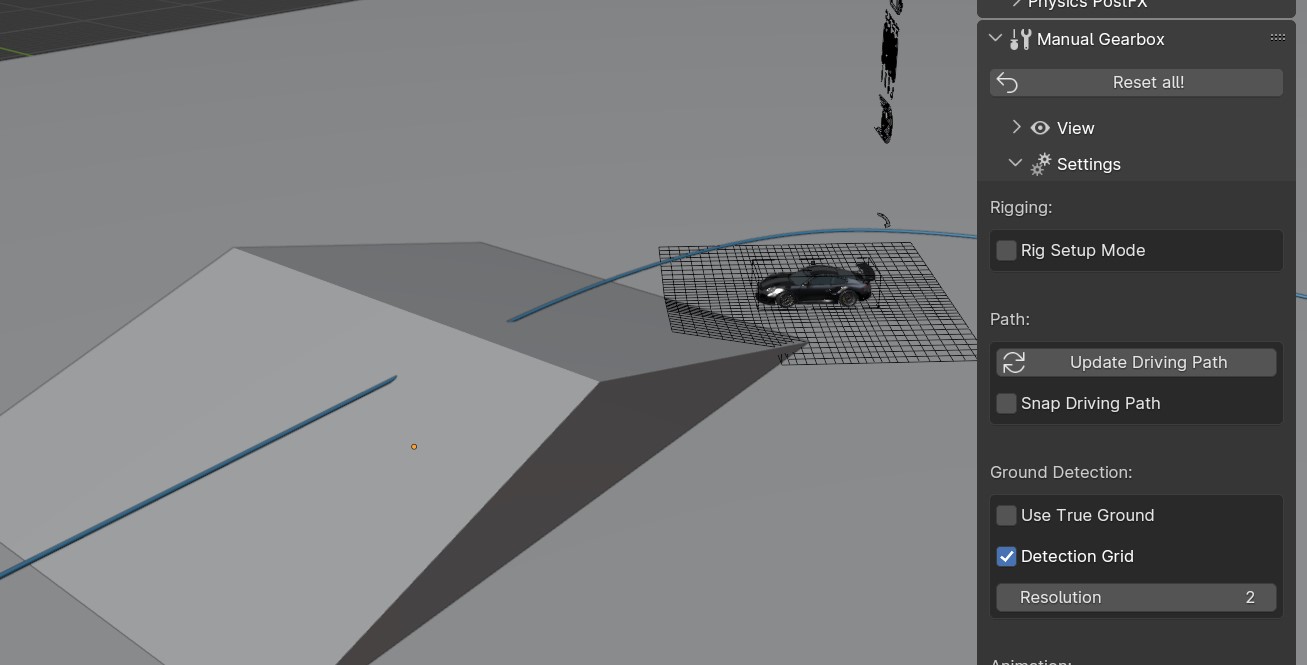
Detection Resolution 1 for smooth motion, 2+ for detailed motion
Use True Ground
Use the actual objects inside the collection ‘GroundDetection’, instead of a projected grid. This can be useful for complex loops or twisting roads built of 1 solid mesh.
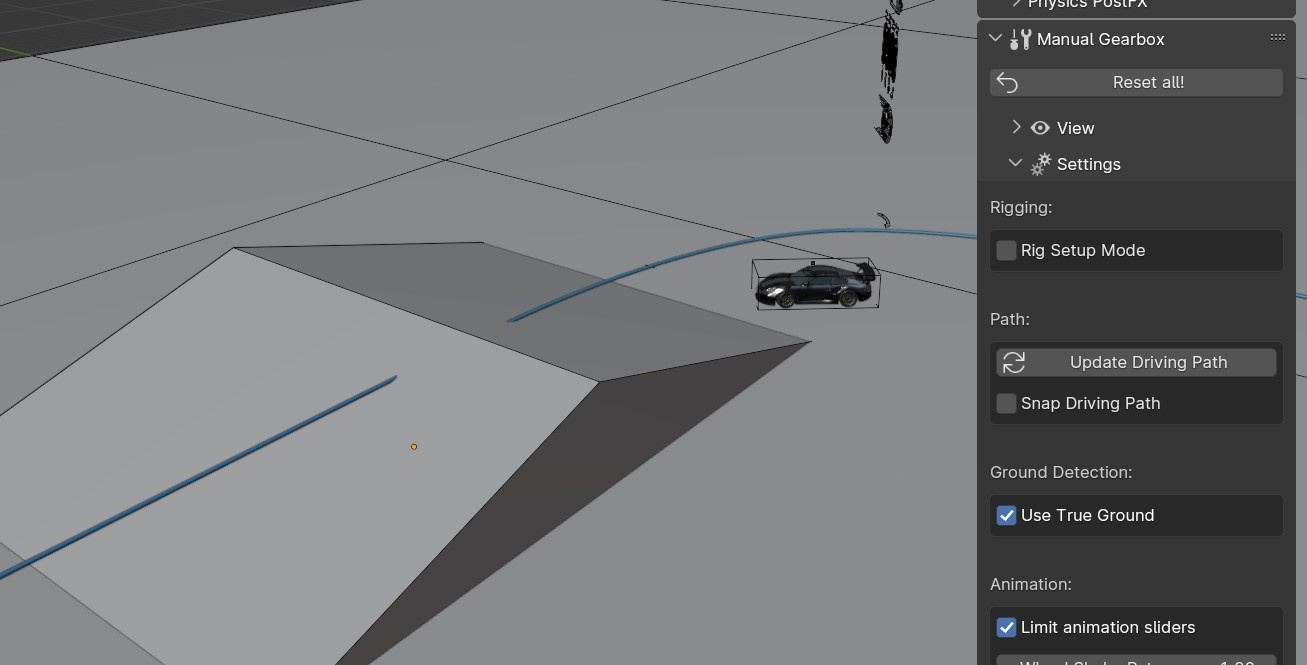
Use actual meshes for Ground detection
Warning
Will generally give a visually worse result and can introduce ‘flickering’ in the detection on ‘layered’ surfaces.
Limit Animation Sliders
To allow full control all the Viewport UI sliders can be “unlocked” so you can over-crank them and get whatever craziness you want.
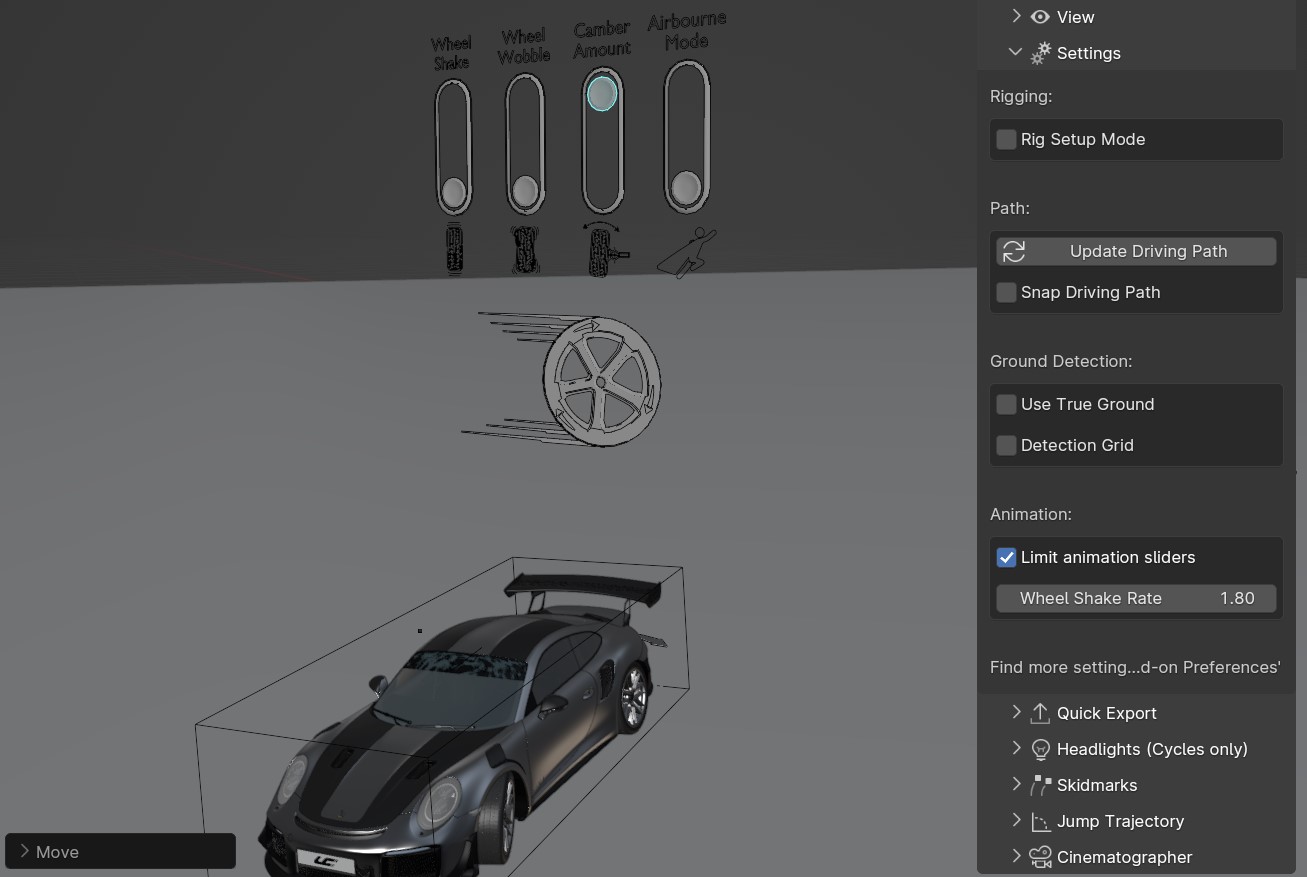
Default: Locks the sliders inside the best range, check to unlocks the sliders
Wheel Shake Rate
How fast the wheel shake is. Higher value produces faster shake.
Quick Export
The Quick Export handles export of the animation to other DCCs such a Unreal Engine, Omniverse, Cinema 4D, Maya, and more. It can also export a baked Blend file for render farms.
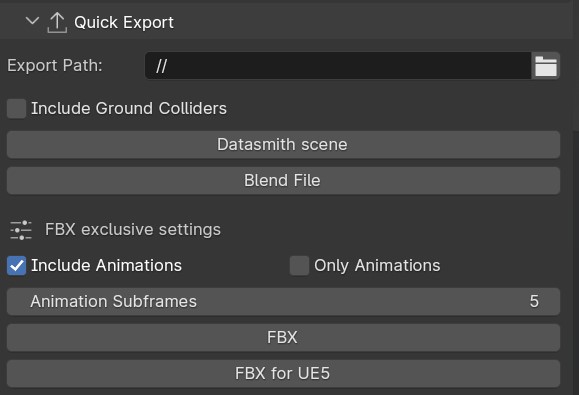
Quick Export Panel in the Manual Gearbox UI
- Export Path:
Set the path as desired. Leaving it blank will export the file as “Launch_Control_Export.FORMAT” relative to the saved .blend file.
- Include Ground Colliders:
Includes all the ground detection meshes in each of the exported file.
FBX Exclusive Settings:
- Animation Subframes:
LC exports the amount of subframes per frame of animation indicated here. The fewer subframes, the faster. Too few subframes can cause reverse-spinning wheels.
- Include Animations:
When checked, LC will export the meshes, the rig and animations. When unchecked, LC will only export the meshes and the rig.
- Only Animations:
When checked, LC will NOT export the meshes, which results in much faster export speeds. However, it will still export the rig and the animations.
This is especially useful when importing to Unreal Engine, where the “Only Animation FBX files” will be read as animation assets, which fit a previously exported “skeletal mesh” (an FBX with the meshes and the rig)
Note
For Datasmoth Scene Export, the free “Blender Datasmith add-on” is needed: https://github.com/0xafbf/blender-datasmith-export
Note
“Rebase bones” are exported with the rig, which can be used inside UE5 to bind static meshes to the exported LC rig.
Note
When exporting “Blend File”, LC will bake the motion to keyframes for each frame of the animation. Be aware that this can cause backward-spinning if the wheels are spinning too fast and the fps is too low.
Headlights
The Headlights Panel help you quickly adjust and render Headlight Beams in front of the vehicle
Note
Only Beams are set up here, not any emitting lamps or meshes inside the headlight geometry.
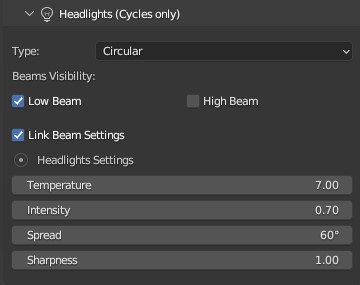
Headlights Panel in the Manual Gearbox UI
Headlights will automatically be rigged if detected in the model. If not, you can manually parent them to the “body” of the vehicle.
Different texture presets can be picked for the light beam. Low Beam and High Beam can be toggled and more settings can be dialed in.
Skidmarks
The Skidmarks Panel helps you generate skidmarks from the tires of the vehicle.
Note
Skidmarks currently only support pressure to calculate the intensity. Wheel-spin or Wheel-locking does not currently affect the generated Skidmarks
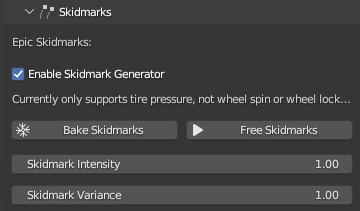
Skidmarks Panel in the Manual Gearbox UI
Jump Trajectory
With the Jump Trajectory Panel, you can generate a realistic jump path for your vehicle.
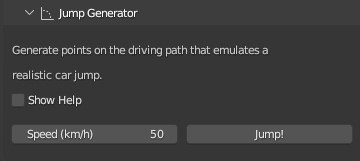
Jump Trajectory Panel in the Manual Gearbox UI
Calculates spline-points of a realistic car jump depending on the input speed.
To use it, go into edit-mode on the “DrivingPath” and select the last point, which has to be the very end of the “ramp” the car is going to jump from. This last point needs to have a handle. The angle of the handle will be the take-off angle and the “Jump Speed” (Speed of the car at take-off point) must be defined in the Add-on UI. If you prefer Imperial Units, you can check the check-box in the Add-on UI. The calculation will always expect the end of the jump is on Z=0.
Cinematographer
The Cinematographer Panel will help you quickly set up Cameras for your Animation.
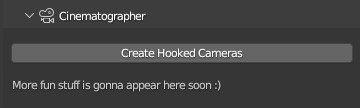
Cinematographer Panel in the Manual Gearbox UI
Click the “Create Hooked Cameras” to generate two cameras from the 3D view hooked to the active vehicle. The “Follow Cam” will track the general motion of the vehicle without taking the suspension into account, while the “Mounted Cam” will be attached to the body of the vehicle, following its every move
Rig Info
The Rig Info Panel will show you if the rigged vehicle which is currently active is compatible with the version of the Launch Control Addon you have installed.
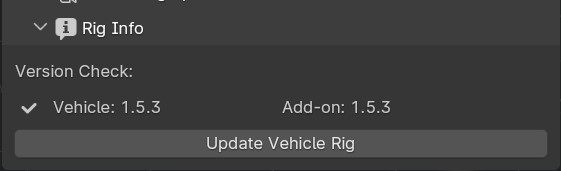
Rig Info Panel in the Manual Gearbox UI
You can also “Update Vehicle Rig” to automatically unrig your 1.5+ vehicle and rig it with the rig armature that matches the installed version of LC. In the process, LC will store the animtion data, driving path, ground detection, all the physics settings and rig setup settings and apply them after the re-rigging is done. Depending on the versions some data might not be possible to apply, so expect loss of data if you are updating an old file.
If you have a file with a “Legacy Rig” (Rigged in LC 1.0-1.3), you can try to “Update Vehicle Rig” too, but the successrate will be lower.
If a new version of the Launch Control Add-on is available, a box will pop up here notifying you about this. You can either pick to “Ignore” and not get this notification anymore, or head “To Download Page” to update your version of the add-on. Make sure you are logged into the selected download page and that you picked the right page inside the Add-on Preferences for Launch Control.